Projects
AR Labeler
Project detects multiple objects in Augmented Reality and generates labels on top of them using Core ML.
Getting Started with ARKit
Augmented reality (AR) describes user experiences that add 2D or 3D elements to the live view from a device’s camera in a way that makes those elements appear to inhabit the real world. ARKit combines device motion tracking, camera scene capture, advanced scene processing, and display conveniences to simplify the task of building an AR experience. You can create many kinds of AR experiences with these technologies using the front or rear camera of an iOS device.
Overview
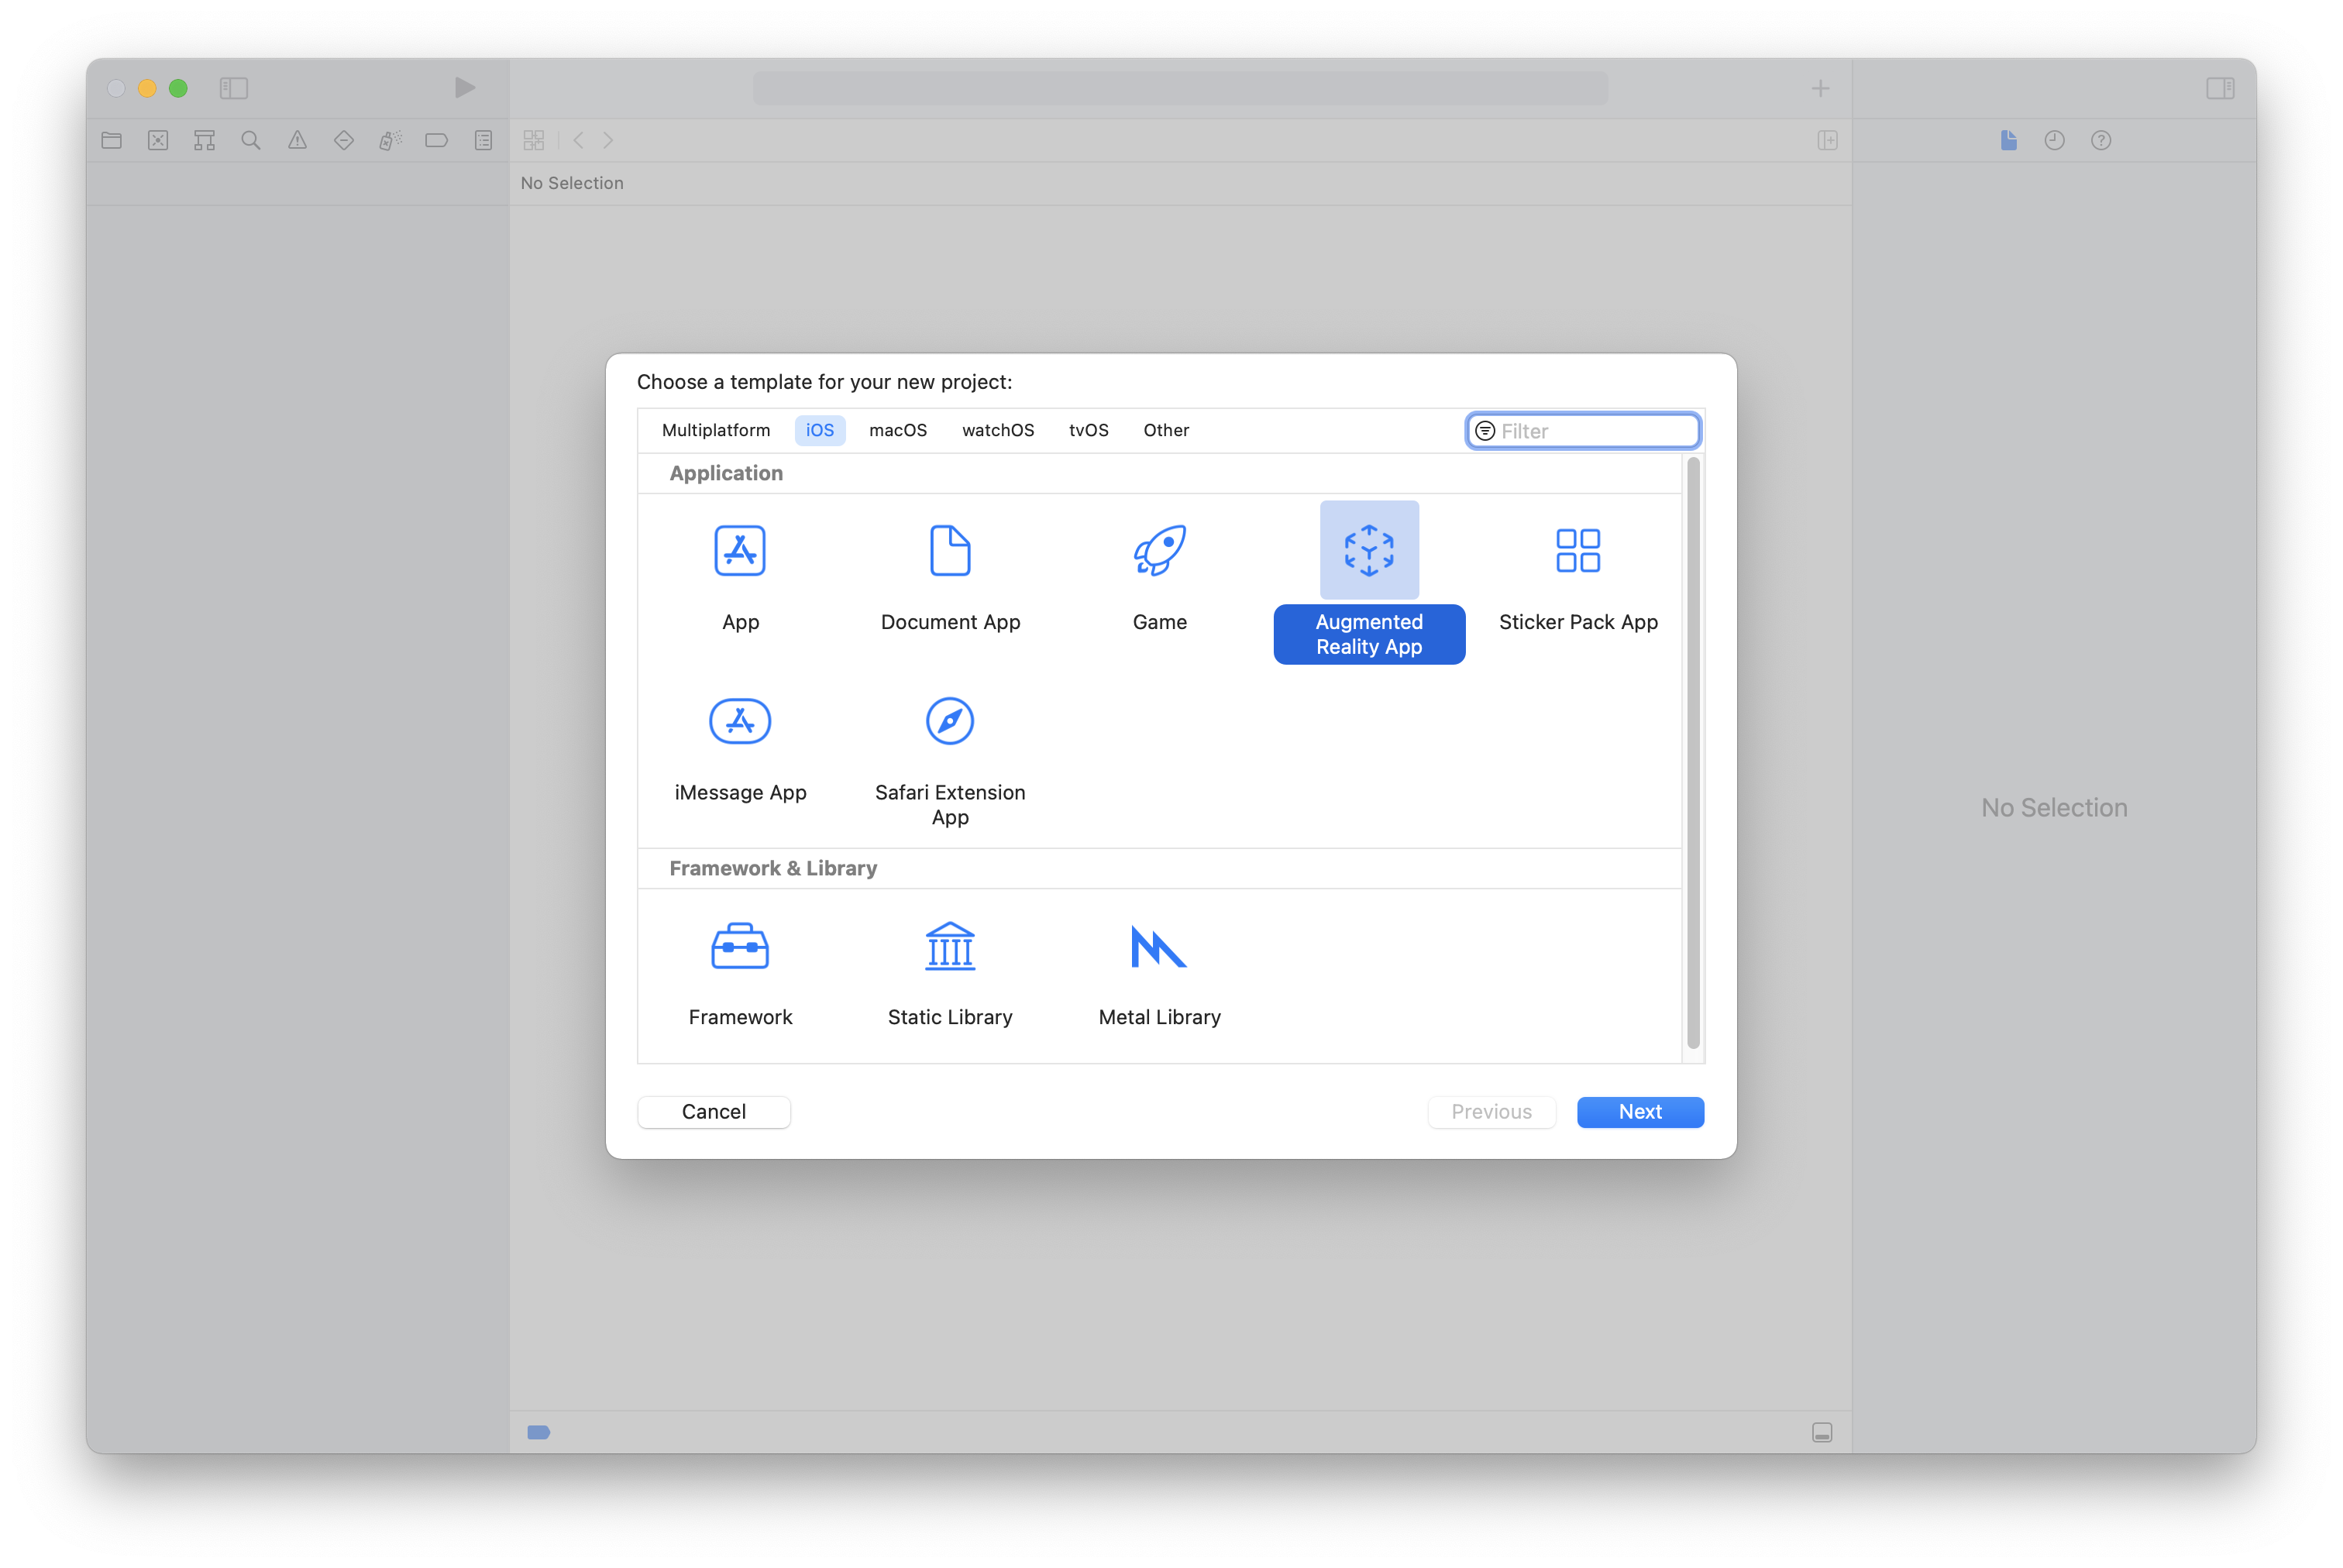
Step 1:
In xcode create a new project and select “Augmented Reality App” under applications. Then click “Next”.
Step 2:
Enter desired project name and be sure you’re signed into an iCloud account to select yourself for “Team”. This will be used for testing your app on a connected iPhone later. For “Content Technology” make sure SceneKit is selected. And click “Next”.

Step 3:
Double check you are listed having a “Signing Certificate” under “Signing & Capabilities” after selecting the project in the in the sidebar.

This is what you base code should look like for ViewController.swift
import UIKit
import SceneKit
import ARKit

class ViewController: UIViewController, ARSCNViewDelegate {

    @IBOutlet var sceneView: ARSCNView!

    override func viewDidLoad() {
        super.viewDidLoad()

        // Set the view's delegated
        sceneView.delegate = self

        // Show statistics such as fps and timing information
        sceneView.showsStatistics = true

        // Create a new scene
        let scene = SCNScene(named: "art.scnassets/ship.scn")!

        // Set the scene to the view
        sceneView.scene = scene
    }

    override func viewWillAppear(_ animated: Bool) {
        super.viewWillAppear(animated)

        // Create a session configuration
        let configuration = ARWorldTrackingConfiguration()

        // Run the view's session
        sceneView.session.run(configuration)
    }

    override func viewWillDisappear(_ animated: Bool) {
        super.viewWillDisappear(animated)

        // Pause the view's session
        sceneView.session.pause()
    }

    // MARK: - ARSCNViewDelegate

/*
    // Override to create and configure nodes for anchors added to the view's session.
    func renderer(_ renderer: SCNSceneRenderer, nodeFor anchor: ARAnchor) -> SCNNode? {
        let node = SCNNode()

        return node
    }
*/

    func session(_ session: ARSession, didFailWithError error: Error) {
        // Present an error message to the user

    }

    func sessionWasInterrupted(_ session: ARSession) {
        // Inform the user that the session has been interrupted, for example, by presenting an overlay

    }

    func sessionInterruptionEnded(_ session: ARSession) {
        // Reset tracking and/or remove existing anchors if consistent tracking is required

    }
}
Step 4:
Add “import Vision” at the imports at the top of ViewController.swift. The framework is used for identifying objects within the camera for labeling.
The Vision framework performs face and face landmark detection, text detection, barcode recognition, image registration, and general feature tracking. Vision also allows the use of custom Core ML models for tasks like classification or object detection.
import UIKit
import SceneKit
import ARKit
import Vision
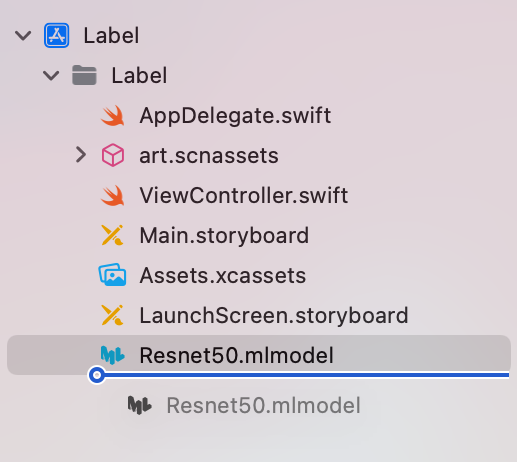
Step 5:
Download and add Resnet50 CoreML model and drag into root folder of your project. Add setup configuration for Resnet50.mlmodel and vision request handler.
class ViewController: UIViewController, ARSCNViewDelegate {

    @IBOutlet var sceneView: ARSCNView!

    private var MLModel = try! Resnet50(configuration: MLModelConfiguration())
    private var hitTestResult :ARHitTestResult!
    private var VRH = [VNRequest]()
Step 6:
Add registerGestureRecognizers() to the viewDidLoad() function. This will be used setting labels via user screen taps. Also be sure to remove the default parameter for SCNScene(), and set statistics to false.
override func viewDidLoad() {
    super.viewDidLoad()

    // Set the view's delegate
    sceneView.delegate = self

    // Show statistics such as fps and timing information
    sceneView.showsStatistics = false

    // Create a new scene
    let scene = SCNScene()!

    // Set the scene to the view
    sceneView.scene = scene

    // Function for setting labels via user screen taps
    registerGestureRecognizers()
}
Be sure to enable plane detection within viewWillAppear() function for running the view.
override func viewWillAppear(_ animated: Bool) {
    super.viewWillAppear(animated)

    // Create a session configuration
    let configuration = ARWorldTrackingConfiguration()

    configuration.planeDetection = .horizontal

    // Run the view's session
    sceneView.session.run(configuration)
}
Step 7
Add private function of registerGestureRecognizers() to the ViewController class.
private func registerGestureRecognizers() {
    let tapGestureRecognizer = UITapGestureRecognizer(target: self, action: #selector(screenTap))
    self.sceneView.addGestureRecognizer(tapGestureRecognizer)
}
Step 8
The screenTap() function will be called whenever user taps on screen.
Records touch location, and centers it on object. The current frame from session (whats in view of camera). The hitTest result from the Resnet50 model. It acts like a plane, we get the touch location. Then check for feature points and return if empty if not hitTestResults is set to itself.
A Core Video “pixelBuffer” is an image buffer that holds pixels in main memory. Pixel buffer is required for the vision request.
@objc func screenTap(recognizer :UIGestureRecognizer) {
    let sceneView = recognizer.view as! ARSCNView
    let tapObject = self.sceneView.center

    guard let currentFrame = sceneView.session.currentFrame else { return }
    let hitTestResults = sceneView.hitTest(tapObject, types: .featurePoint)
    if hitTestResults.isEmpty { return }
    guard let hitTestResult = hitTestResults.first else { return }
    self.hitTestResult = hitTestResult

    let pixelBuffer = currentFrame.capturedImage
    performVisionRequest(pixelBuffer: pixelBuffer)
}
Step 9
Add the displayPredictions() function.
Generates a node representing the point at which a label is referencing pass in text from prediction hitTestResults contains everything related to position of where the user clicked. Uses cordinates of where user clicked to place sphere and aid in text placement above sphere anchor.
private func displayPredictions(text :String) {
   let node = createText(text: text)
   node.position = SCNVector3(self.hitTestResult.worldTransform.columns.3.x, self.hitTestResult.worldTransform.columns.3.y, self.hitTestResult.worldTransform.columns.3.z)
   self.sceneView.scene.rootNode.addChildNode(node)
}
Step 10
Add performVisionRequest(). The function is where label identifying occurs.
Create a vision model and request pass through the model in which the request is going to run. handle errors with a return if nil. Creates observation of what CoreML believes the item is, with a confidence rating.
It then takes the center of the current frame, crops the image to contain the touched object feeds cropped image to coreML and attempts to identify the item. Populates vision request array. This is an array of vision request.
private func performVisionRequest(pixelBuffer :CVPixelBuffer) {
   let visionRequestModel = try! VNCoreMLModel(for: self.MLModel.model)
   let visionRequest = VNCoreMLRequest(model: visionRequestModel) { visionRequest, error in
       if error != nil { return }
       guard let observations = visionRequest.results else { return }
       let observation = observations.first as! VNClassificationObservation
       print("Name \(observation.identifier) and confidence is \(observation.confidence)")
       DispatchQueue.main.async {
           self.displayPredictions(text: observation.identifier)
       }
   }

    visionRequest.imageCropAndScaleOption = .centerCrop
    self.VRH = [visionRequest]
    let imageRequestHandler = VNImageRequestHandler(cvPixelBuffer: pixelBuffer, orientation: .upMirrored, options: [:])

    DispatchQueue.global().async {
        try! imageRequestHandler.perform(self.VRH)
    }
}